A Zola theme built with Tailwind CSS and DaisyUI for presenting the project portfolio of a freelancer, for example. The theme is based on the Blow theme that was created by Thomas Chartron and on my generic Daisy theme. It extends the Daisy with specific pages, taxonomies and shortcodes for managing a project portfolio and supports all color schemes of the Daisy as well. 这是一个基于 Tailwind CSS 和 DaisyUI 的 Zola 主题,适合展示自由职业者等场景下的项目作品集。该主题基于 Thomas Chartron 的 Blow 以及作者的通用 Daisy 主题,并在 Daisy 基础上扩展了管理作品集所需的页面、分类与短代码,同时兼容 Daisy 的全部配色方案。
Check out the live demo of the example project or a real-world implementation of this theme.
若要快速基于此主题创建站点,最简单的方法是直接检出 / fork 示例仓库 并按需修改。该仓库已包含最小可用结构和配置,可直接构建并部署到 Netlify 与 GitHub Pages。
The minimal config.toml file for using the theme looks like this:
base_url = "https://www.example.com"

theme = "project-portfolio"

taxonomies = [
    {name = "projects", paginate_by = 5, feed = true},
    {name = "skills", paginate_by = 5, feed = true},
]Set a light and dark color scheme:
daisyui_theme_light = "light"
daisyui_theme_dark = "dark"
See the themes list in the theme.toml for all possible identifiers. You can also set only a light or a dark color scheme, if you do not want the automatic dark mode switching based on the browser settings of your visitors.
If you want to allow your visitors to change the used color scheme, just set the following variable in the [extra] section of your config.toml:
[extra]
enable_theme_switching = true
There will be a dropdown in the navbar then, for the visitors to select form the color schemes.
To enable support for multiple languages, simply set the default language and add language settings for all your additional languages:
default_language = "en"

[languages.de]
# title and description in the additional language
title = "Projekt-Portfolio"
description = "Beispiel- und Demoseite des Projekt-Portfolio-Themas für Zola."

# don't forget to enable features like search or feed
# generation for the additional language as well
build_search_index = true
generate_feeds = true

# also any taxonomies of your default language need to
# be defined for the additional language as well
taxonomies = [
    {name = "projects", paginate_by = 5, feed = true},
    {name = "skills", paginate_by = 5, feed = true},
]
Taxonomies should have exactly the same (not translated) name in all languages, for the language switching to work best.
You need to create an i18n file containing the translations for all theme variables for all the languages of your website, if they are not included in the theme. Right now, English, German, Hungarian, Finnish are included. You can create a the directory i18n in your website root directory and the language files in there will be picked up by the theme. It would be great, however, if you create a pull-request on the theme repository to add your translations to the theme.
Integrating a search into your website is as easy as adding the following to your configuration:
# enable it globally for the default language
build_search_index = true

[search]
# only this format is supported by the theme
index_format = "elasticlunr_json"

# you need to enable search at all your language sections as well
[languages.de]
build_search_index = true
As soon as build_search_index is enabled, the search indices are created for all languages that have this variable enabled in their section in the config.toml and the search bar is shown in the navbar of the website.
Just be aware, that you need to add an Elasticlunr.js-compatible Lunr Languages file to your static directory, if you are using other languages than English and German. See the corresponding repository for the min files. Feel free to add support for your languages to the theme as well, via a pull-request.
Arbitrary links can be added to the footer by defining the following list in the [extra.navbar] section:
[extra.navbar]
links = [
    { url = "projects", i18n_key = "projects" },
    { url = "skills", i18n_key = "skills" },
    { url = "blog", i18n_key = "blog" },
]
The value of the i18n_key must be in the i18n files for your languages (see en.toml, for example).
All three parts of the footer can be adapted: the links, the social icons, and the copyright notice.
Arbitrary links can be added to the footer by defining the following list in the [extra.footer] section:
[extra.footer]
links = [
    { url = "about", i18n_key = "about" },
    { url = "sitemap.xml", i18n_key = "sitemap", no_translation = true },
]
The value of the i18n_key must be in the i18n files for your languages (see en.toml, for example). If the parameter no_translation is set to true, than the URL is not adapted to contain the current language code. This is needed for external links or something like the sitemap.xml in the example, that is not translated within your website.
The social icons in the footer can be adapted by setting any of the following variables:
[extra.social]
codeberg = ""
github = ""
gitlab = ""
stackoverflow = ""
mastodon = ""
linkedin = ""
instagram = ""
youtube = ""
signal = ""
telegram = ""
email = ""
phone = ""
For every non-empty variable, the corresponding icon is shown in the footer.
The copyright notice in the footer can be set by adding the following variable in the configuration:
[extra.footer]
notice = "This is my <b>copyright</b> notice."
HTML can be used there.
The theme makes use of Zola code highlighting feature and supports setting a different color scheme depending on whether a light or dark theme is active. Just enable syntax highlighting the following way:
highlight_code = true
highlight_theme = "css"A title and text can be added to the index page by creating a file _index.md in the content directory. Additionally, a slogan and an image an be configured in the config.toml:
[extra.index]
slogan = "Slogan text that is shown under the title"
image = "portrait.png"
image_alt = "Placeholder text describing the index's image."
You can also created a completely different index page, by overwriting the index.html template in the template directory of your site. Just inherit from the page.html template of the theme.
The installation of the theme works the same as for other Zola themes. As it is described in the official documentation. Hence, it fist needs to be added as a git submodule:
cd my-zola-website
git submodule add -b main \
    https://codeberg.org/winterstein/zola-theme-project-portfolio.git \
    themes/project-portfolio
Please make sure to add it at the path themes/project-portfolio in your Zola directory. The translations and the icons won't work if added to a different directory.
In the config.toml file it needs to be selected then:
theme = "project-portfolio"Create the files projects.md and skills.md in your content directory that are used to show the "Projects" and "Skills" taxonomies. They both need a title and can optionally get a descriptive text that will be shown above the terms of the taxonomy. See the following projects.md file as an example:
+++
title = "Projects"
+++

The title and the text of this page can be adapted by changing the
`projects.md` file in the `content` directory.

Check out the amazing projects, by browsing through the industrial
sectors. The project do not need to be categorized by industries, but
could be distinguished by other topics instead. For example by frontend
and backend projects or by main responsibilities, like developer or
lead. Whatever makes most sense for your project portfolio.
It would be shown with the configured title and content like this above the terms:

The skills.md file can be created the same way. The corresponding page will just show the terms of the skills taxonomy instead of the terms of the projects taxonomy then.
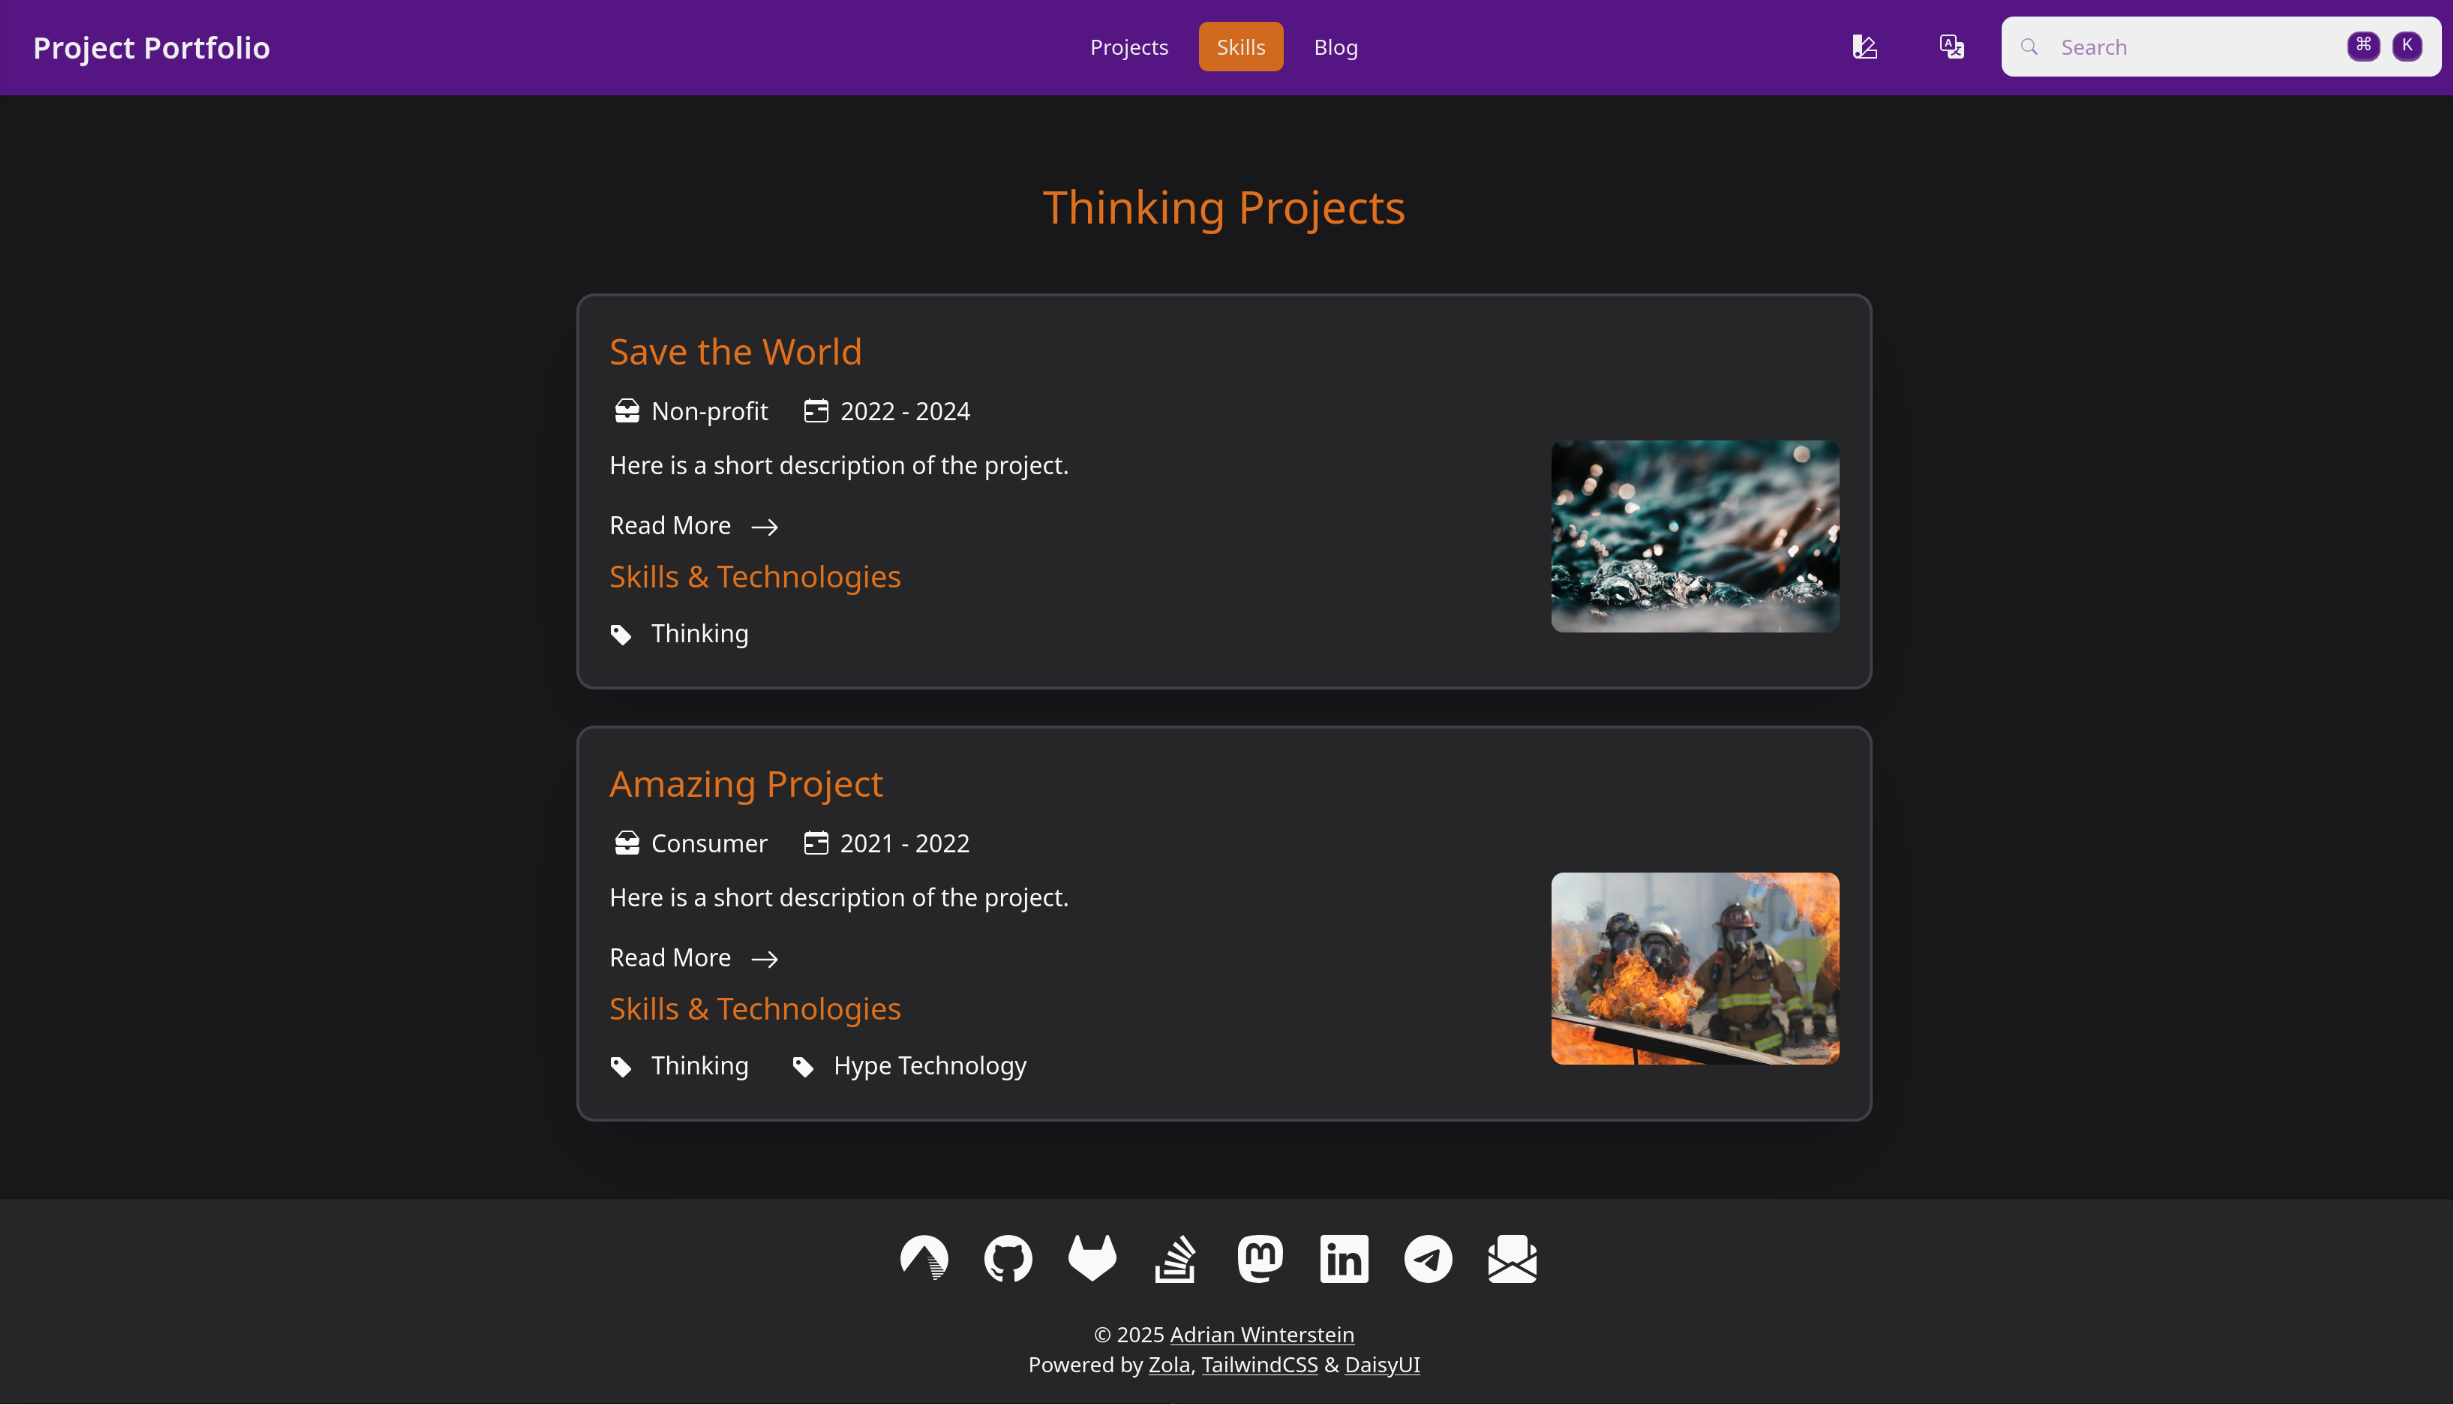
Finally, create the first project page in the content directory:
+++title = "Project Title"
description = "Here is a short description of the project."
date = 2022-05-31 # The date when the project finished
[extra]
date_start = 2021-01-01 # Optional date when the project was started
image = "water.jpg" # Optional filename to an image in the `static/images` directory
top_project = true # Optional parameter to show the project on the projects overview page as well
[taxonomies]
projects=["Consumer"] # The category of the project (could be industry, type etc.)
skills=["Thinking", "Hype Technology"] # The skills & technologies used for the project+++
The content of the project description page follows here.The generated project site would then look like this:

The page template can be extended with custom CSS or JavaScript files (or code) by inheriting the template and overwriting the blocks extra_headers or extra_javascript. The content of extra_headers will be added at the end of the <head> section of each page, while the content of extra_javascript will be added at the end of the <body> section of each page.
{%/* extends "daisy/templates/base.html" */%}

{%/* block extra_headers */%}
<!-- add an own stylesheet for example -->
<link rel="stylesheet" href="{{ get_url(path='my_custom_style.css') }}">
{%/* endblock */%}

{%/* block extra_javascript */%}
<script>
    /* here is some custom JavaScript code */
</script>
{%/* endblock */%}
In most cases, however, you would probably not extent the base template, but the more specific templates like page, section, or index. As they are themselves derived from the base template you can override the extra_headers and extra_javascript blocks the same way in those cases.